Castlevania: Symphony of the Night Engine Tool Suite (SotNgine)
Documentation
Table of Contents
|
|
This is your GUI-based gateway into the entire SotNgine tools suite.
It provides easy to follow workflows for common tasks, and serves as a launcher for the other tools. |
|
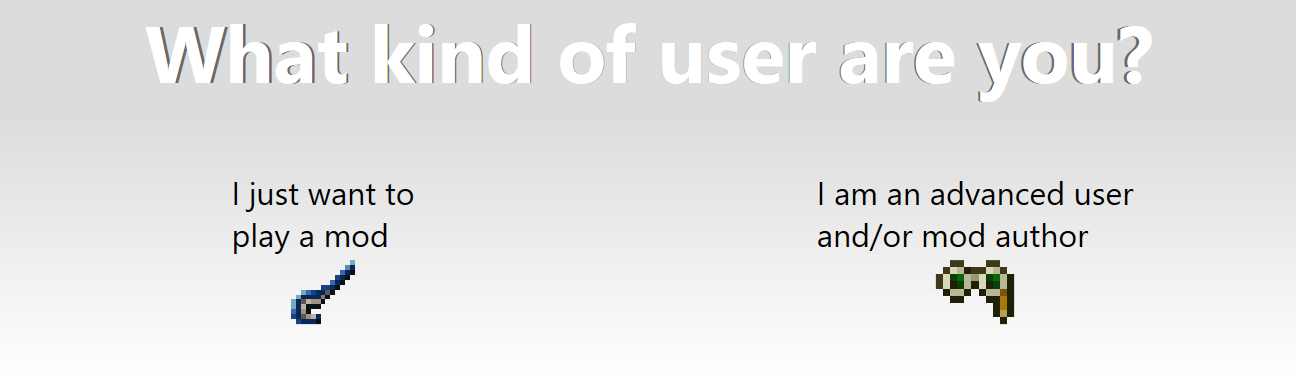
When first launching SotNgine GUI, you'll be presented with a simple screen asking what kind of user you are. Using SotNgine GUI from this screen is called Simple Mode.
|
|
Click on I just want to play a mod to use a simple wizard that will walk you through all of the steps required in order to use a mod you have downloaded.
|
Click on I am an advanced user and/or mod author to have the full, Flow-based interface exposed to you for the more advanced tasks required in order to create or otherwise manipulate mods. This new interface is called Advanced Mode.
|
|
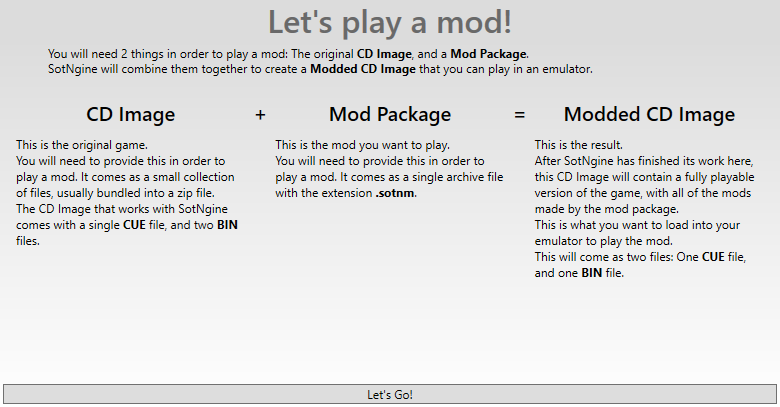
This wizard will walk you thought the necessary steps to create a playable CD Image containing the mod you'd like to play.
|
|
Overview
This page gives an overview of what to expect from this wizard.
It basically describes that you will need an original CD Image for Castlevania: Symphony of the Night, and a Mod Package, in order to create a playable Modded CD Image. Click on the Let's Go! button to get started. |
|
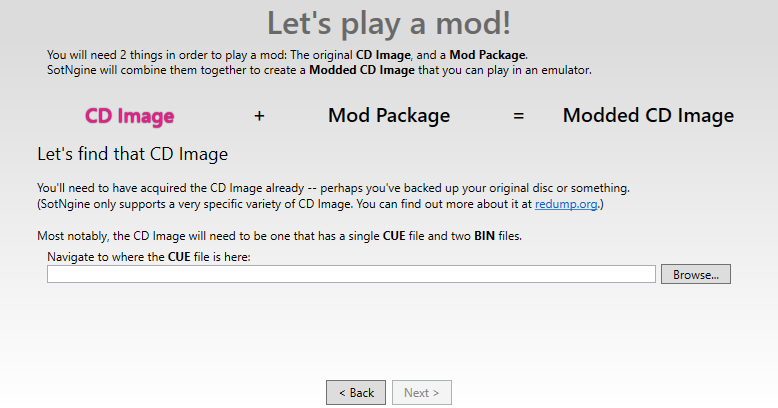
CD Image
This page is requesting the location of the original CD Image for Castlevania: Symphony of the Night.
Click on the Browse button in order to set this location, then click on the Next button to continue. |
|
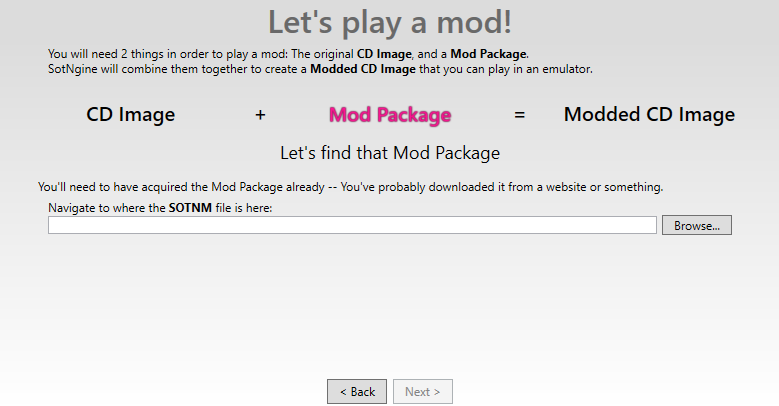
Mod Package
This page is requesting the location of the Mod Package you'd like to use.
Click on the Browse button in order to set this location, then click on the Next button to continue. |
|
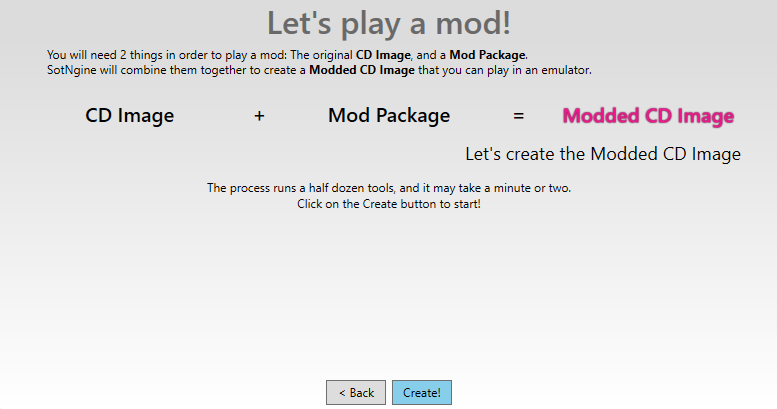
Modded CD Image
This page is for actually creating the playable Modded CD Image you'll use to play the mod.
Click on the Create button to start the process. It may take a few minutes to run, during which you'll see a progress bar on the screen. |
|
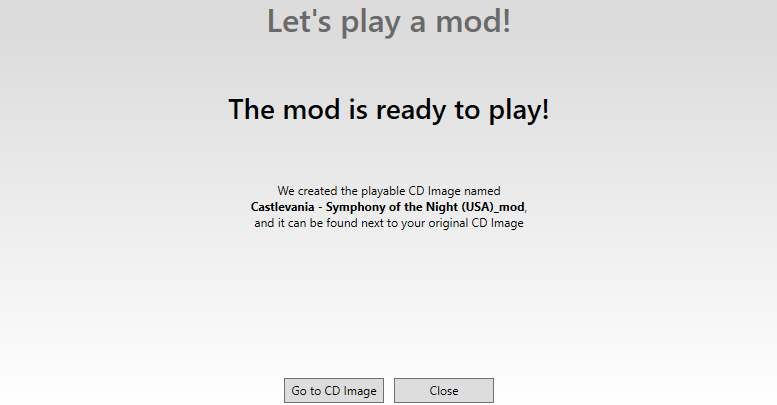
Finished!
This page is informing you that the playable Modded CD Image has been created, and gives you the option to either open an explorer window at the location of it, or to close the wizard.
|
|
This mode exposes all of the operations supported by SotNgine GUI. Each one is represented as a Flow, which is an expandable series of Flow Steps that must be completed from left to right, in order to configure and run one or more of the underlying tools.
|
|
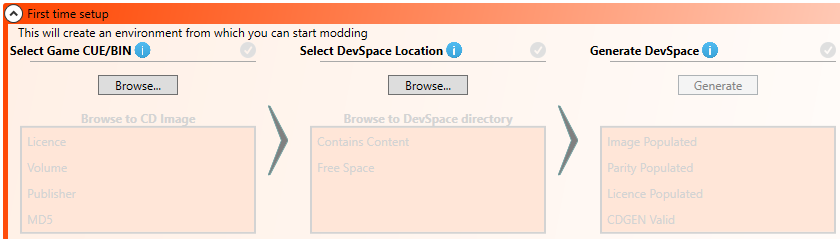
The first time you launch the SotNgine GUI, you'll be presented with this screen, asking you to set up your initial devspace.
This flow is a series of steps for you to follow, starting on the left, and working your way to the right. You'll see this flow pattern elsewhere in SotNgine GUI as well.
|
|
This flow will take you through the steps necessary to take your Castlevania: Symphony of the Night CD Image and convert it into a devspace that you can then start modding from.
|
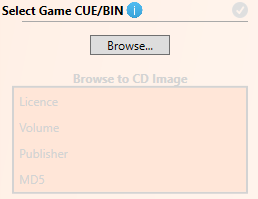
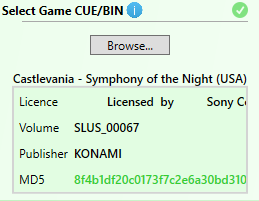
Select Game CUE/BIN
Click on the browse button and navigate to your Castlevania: Symphony of the Night CD Image .CUE + .BIN files. You must select the .CUE file, however any .BIN files referenced by it must also be present.
|
|
|
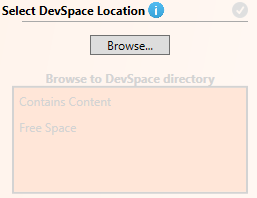
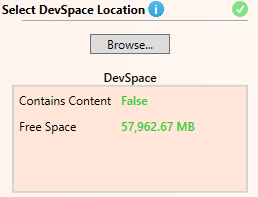
Select DevSpace Location
Click the browse button and navigate to the directory you'd like to use as your devspace. This is the location that SotNgine GUI will extract the files from the CD Image, as well as where it will store other information that will be needed by other tools later.
|
|
|
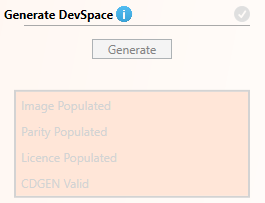
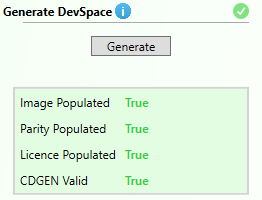
Generate DevSpace
Click the generate button to have SotNgine GUI do its setup magic. This will create the following directories in your devSpace:
|
|
Once your devSpace has been generated, the entire First Time Setup flow will turn green and collapse. You won't have to perform these steps again unless you want to start over again, or are doing much more advanced modifications. You can just expand this section again if you want to repeat.

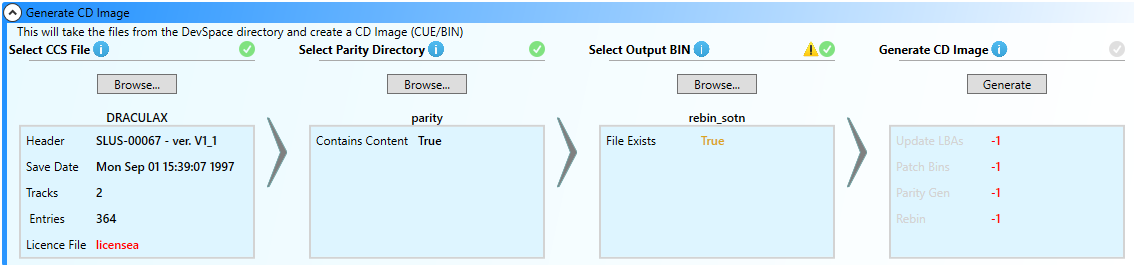
This flow will take you through the steps necessary to generate a new CD Image that contains all of the modification you've made to the files in your devspace.
|
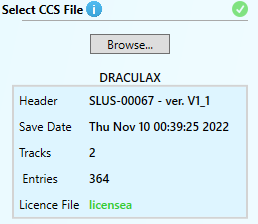
Select CCS FileSelect the DRACULAX.CCS file that was extracted during your First Time Setup flow above.
This step should be auto-populated for you as a result of the First Time Setup, but if you need to fill this in again, the default location for this file is <devSpace>/img/XA/DRACULAX.CCS. This file is necessary, as it contains information on how to organize the files on the CD Image, such as interleaving, CD sector modes, etc..
|
|
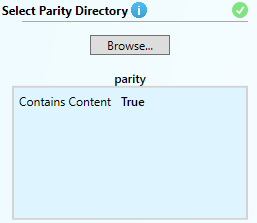
Select Parity Directory
Select the directory that contains your parity cache.
This step should be auto-populated for you as a result of the First Time Setup, but if you need to fill this in again, the default location for this directory is <devSpace>/meta/parity/ CD Images contain parity information to help when there are read errors. This can take a while to compute, so SotNgine GUI saves this information in the parity directory to save a lot of time when generating a CD Image.
|
|
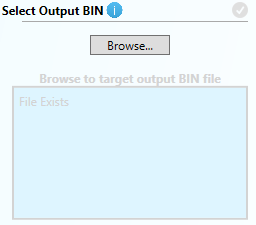
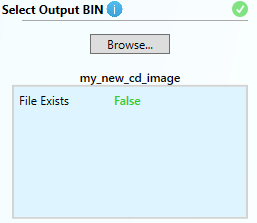
Select Output BINClick on browse and navigate to where you'd like to save your new CD Image. Type in a filename, and click Save.
This is the location that your new CD Image will be saved at. |
|
All of the above settings will be saved, and you will not need to fill them out in the future. However, you can always revisit any of the steps in this flow to change which settings you want to use.
|
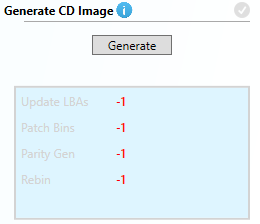
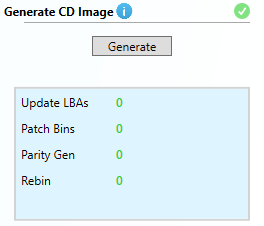
Generate CD Image
Click on generate to have SotNgine GUI do its CD Image generation magic.
The resulting error codes will be output here (0 means "no error", or success). This will run 4 operations that will ultimately end up with a fully functional CD Image containing any modifications you've made inside your devSpace.
|
|
Update LBAs
|
CD Images are composed of sectors, and each file stored on the CD will fill many of these sectors (except for the end of the file, which will only fill as much of the sector as necessary, leaving the rest of the sector blank). These sectors are referred to in code by their LBAs (Logical Block Addresses).
|
If your modifications end up increasing the size of any of the files in the CD Image, that will necessarily push all of the following files on the CD to use later LBAs. This operation will calculate the new LBAs necessary for all of the files on the CD Image, storing them (along with filesize info/etc) inside the CCS file.
Patch Bins
|
The majority of PSX games don't actually use a file system to load files like PC games do, as it's quite slow trying to do so on a CD-ROM. Instead, PSX games will directly use the LBA for the file they're looking for, telling the CD drive's read head to move directly to the correct sector, with no knowledge of the actual filename.
|
Because of this, that means there are a whole bunch of hard-coded LBAs stored in the game's executable code, which is spread out between a few different core files extracted from the CD Image, as well as some of the map files. Since the files may now be stored at a different sector, as discovered by the Update LBAs step above, all of these hard-coded LBAs now need to be patched to point to the new, correct sectors.
Parity Gen
|
CDs are prone to read errors due to scratches/grime on the surface of the CD, jostling of the actual CD drive during a read operation, or a variety of other things. Because of this, the CD Image standard ensures that all CD Images contain a block of parity bytes for every sector of the CD. These parity bytes can be used to generate the majority of data that was misread in the sector in the case of an error.
|
For any files that haven't been modified, these parity bytes already exist in the parity directory as a result of DevSpace Generation, however for any files that have been modified, the parity bytes that were put there will no longer be valid. This operation will check any existing parity bytes, and re-generate any that are no longer valid.
Rebin
|
This is the final step! This operation will read the CCS file and use it to write the files in the devSpace (in combination with their parity bytes) into a functional CD Image.
|
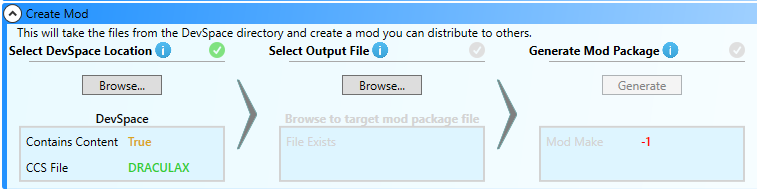
This flow will take you through the steps necessary to create a new mod package that you can distribute for others to play your mod.
|
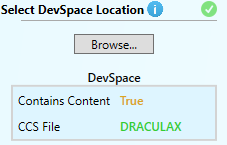
Select DevSpace Location
Select the DevSpace directory that will serve as the source for the mod package. This should be auto-populated for you if you've already completed the First Time Setup Flow, however you can override this if you'd like to use a different DevSpace.
|

|
Select Output File
Select the path to the mod package you'd like to create. The output file will use the .sotnm extension.
|
|
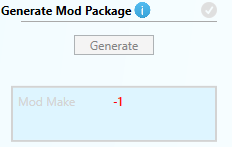
Generate Mod Package
Click on the Generate button to start the process of generating your mod package.
The resulting error codes will be output here (0 means "no error", or success). Once successfully completed, your selected output file will contain everything you need to distribute to others who want to play your mod. This file is just a specially formatted .zip file, so there is no need to compress it for space reasons. |
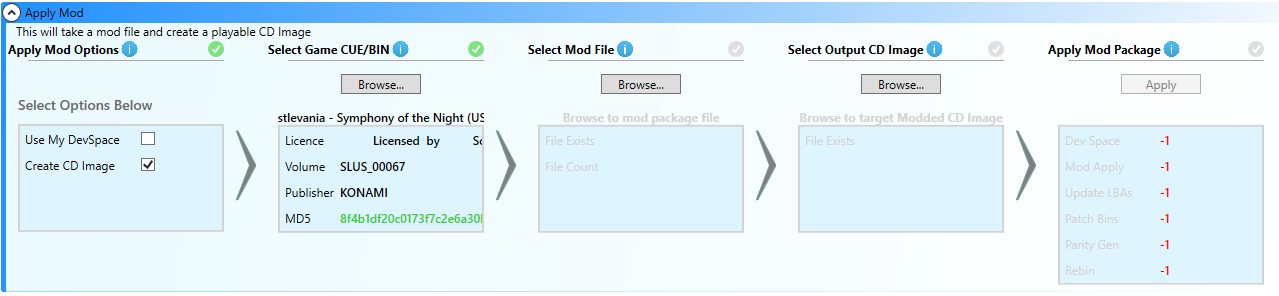
This flow will take you through the steps necessary to apply a mod to a DevSpace.
|
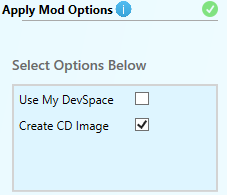
Apply Mod Options
Options that modify the steps for applying the mod.
|
|
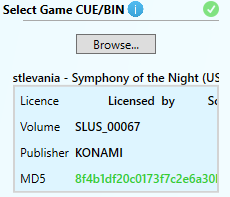
Select Game CUE/BIN
Select an original CD Image for Castlevania: Symphony of the Night. This is the CD Image to use when creating a temporary DevSpace.
This step is only applicable if the Use My DevSpace option is disabled. |

|
Select Mod File
Select the mod package file you'd like to apply. This will be applied to the configured DevSpace.
|
|
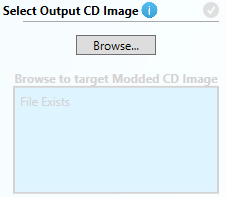
Select Output CD Image
Select the path to your desired playable modded CD Image file. This will be a complete CD Image containing the mod that was applied.
This step is only applicable if the Create CD Image option is enabled. |
|
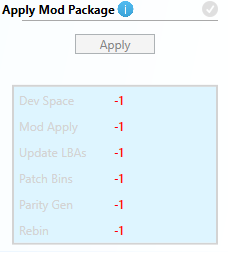
Apply Mod Package
Click Apply to start the process of running all of the applicable tools to generate your configured output. This will be a playable Modded CD Image if the Create CD Image option is enabled, or just a modified DevSpace otherwise.
The resulting error codes will be output here (0 means "no error", or success). |
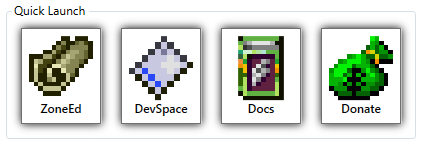
Here you'll find one-click buttons to launch common tasks. All of the GUI-based tools provided in the SotNgine tool suite are available here. Some of these tools are only available in Advanced Mode.
|
|
|
|
This is the tool to use for modifying map files.
Use the middle or right mouse buttons to drag/pan the view, and the left mouse button to select elements. The general layout of each mode is to have controls on the left side, and a preview on the right side.
On the left side you'll always find the name of the current mode at the top, with a back button (except in the Overview) that can be clicked to return to the previous editing mode. |
A note on how the world works in Castlevania: Symphony of the Night:
Each thematic "area" of the game (typically, every time you walk through a door leading to a "CD" loading room, you're transitioning between these areas...) is called a zone, and is stored as a collection of files found in its own directory under <devSpace>/img/ST/. The files that make up a zone are as follows:
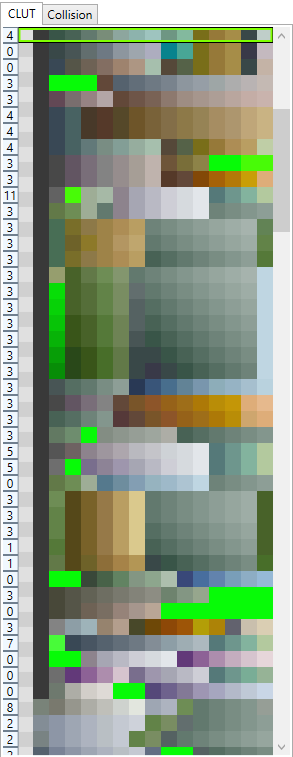
Each CLUT contains 16 colors, meaning a single tile can only use 16 different colors max.
Each thematic "area" of the game (typically, every time you walk through a door leading to a "CD" loading room, you're transitioning between these areas...) is called a zone, and is stored as a collection of files found in its own directory under <devSpace>/img/ST/. The files that make up a zone are as follows:
- XXX.BIN -- This is the layout file, it contains information on how all of the rooms/tiles/etc are composed together to make the whole zone.
- F_XXX.BIN -- This is the graphics file, it contains the raw graphics that are used by the tiles in this zone.
- SD_ZKXXX.VH -- This is the audio header file, it contains lookup information for working with audio binary data.
- SD_ZKXXX.VB -- This is the audio binary file, it contains the actual audio data being referred to by the audio header file.
Each CLUT contains 16 colors, meaning a single tile can only use 16 different colors max.
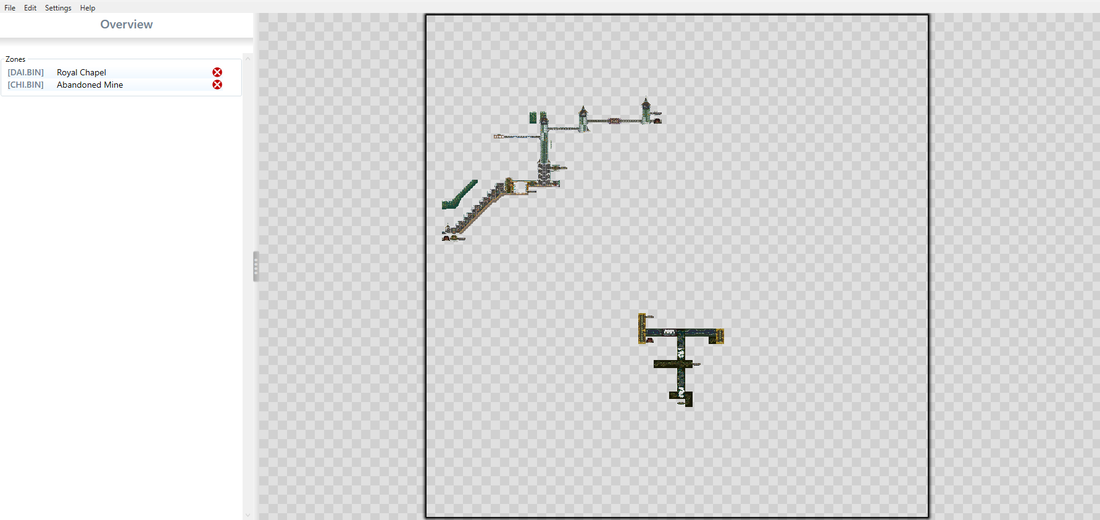
This is where you start, and is your most zoomed-out view. If you have multiple map files loaded, you'll be able to see them all here
|
Overview Control Panel
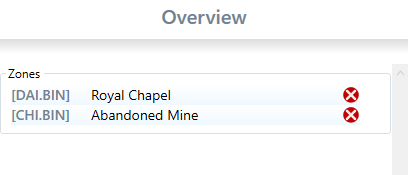
Zone List
Lists all currently loaded map files, along with a button to unload them. Clicking on one of these zones will hide the other zones and enter Zone Edit Mode. |
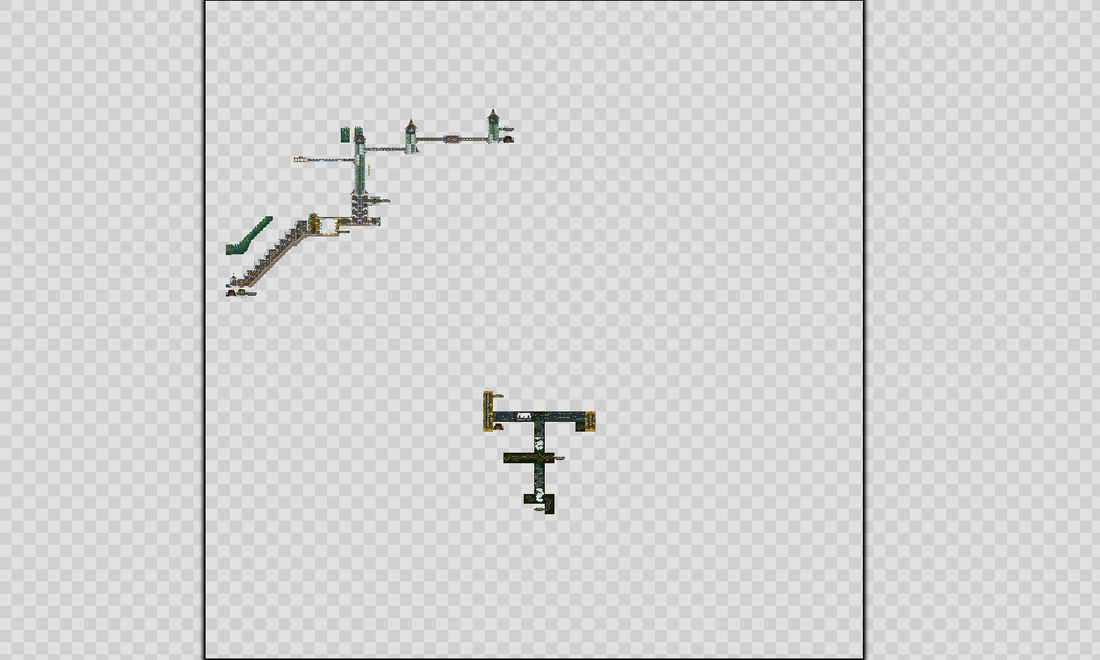
Overview Preview
A preview of where the loaded zones sit within the overall castle map (the black borders).
Clicking on one of these zones will hide the other zones and enter Zone Edit Mode.
|
|
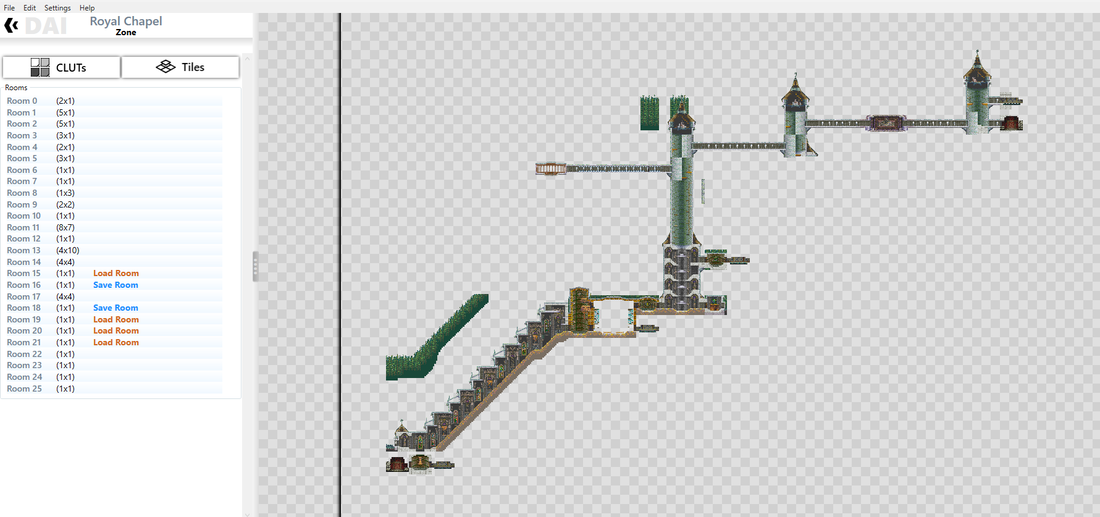
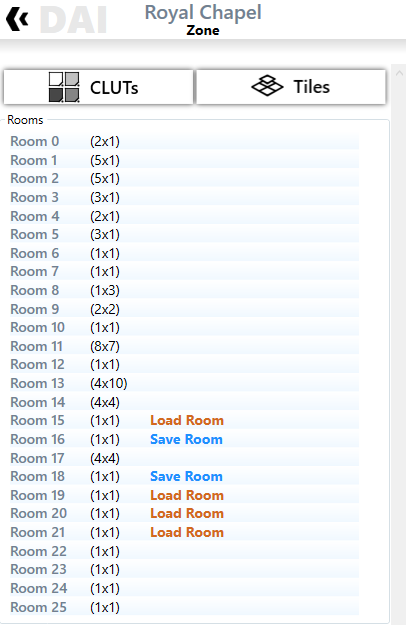
Each zone is composed of a collection of rooms, each of which have variable dimensions that match how many map "blocks" are discoverable via the in-game map for that room. Each of these map blocks represents 16x16 tiles in the actual room.
|
Zone Edit Control Panel
CLUTs Button
Click this button to enter the All CLUTs List. This will allow you to edit any of the defined CLUTs in this zone, regardless of where they're used. Tiles Button Click this button to enter the All Tiles List. This will allow you to edit any of the defined tiles in this zone, regardless of where they're used. Rooms List Lists all of the defined rooms in this zone. Clicking on one of these will hide the other rooms and enter Room Edit Mode. |
Zone Edit Preview
A preview of where the defined rooms for this zone sit within the overall castle map (the black borders).
Clicking on one of these rooms will hide the other rooms and enter Room Edit Mode.
|

|
|
|
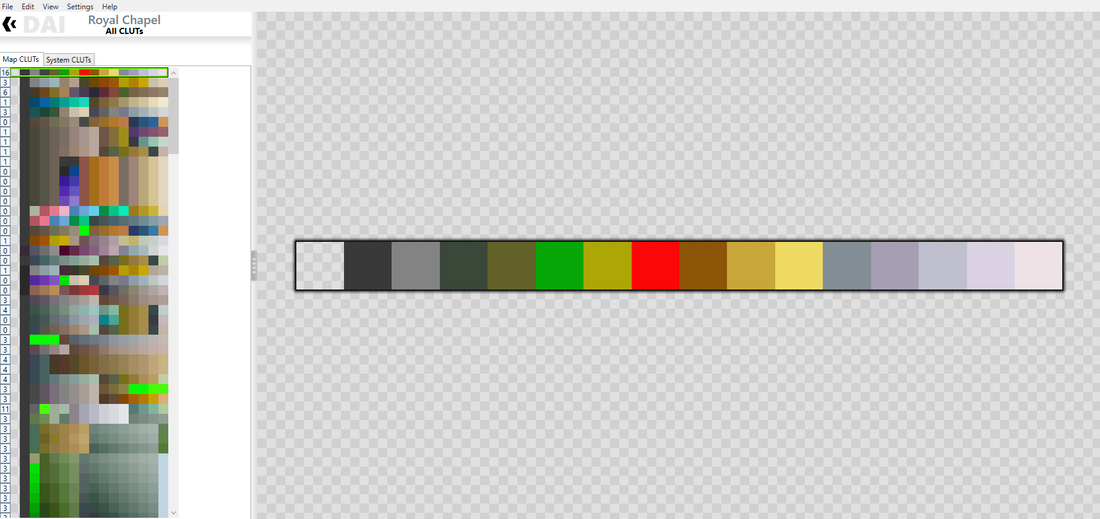
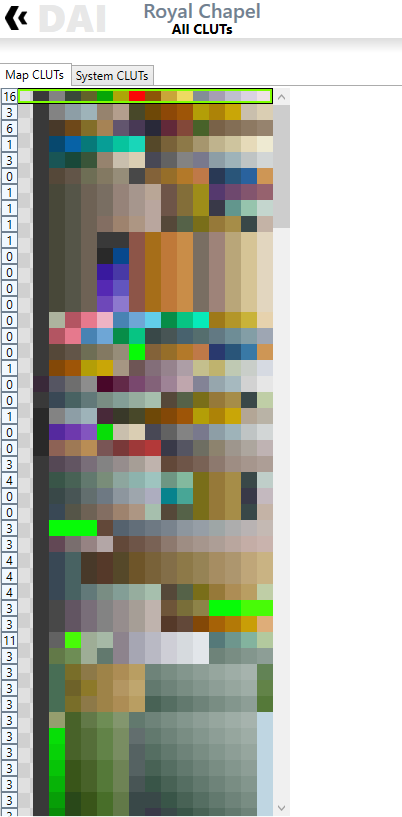
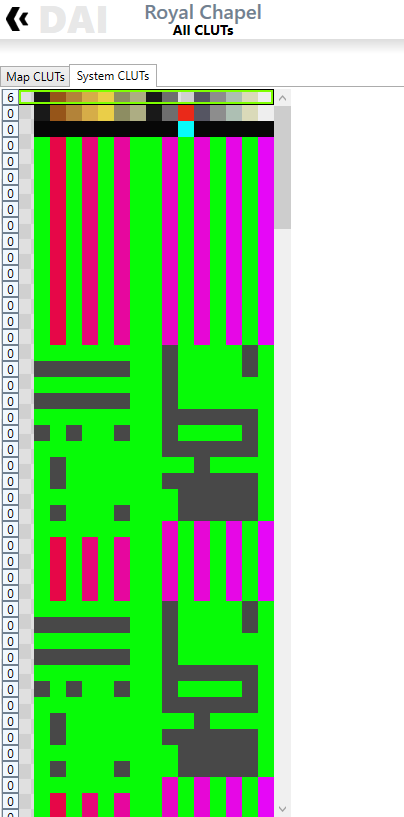
All CLUTs Control Panel
Each row of 16 colors in these listings represents a single CLUT. To the left of each CLUT is a number representing how many rooms are currently using tiles that have this CLUT assigned. Mouse over this number to get a listing of which rooms they are.
Map CLUTs Lists all of the CLUTs that are defined for this zone. Clicking on one of these will select it for preview on the right. Double clicking on one of these will hide the other CLUTs and enter CLUT Edit Mode. System CLUTs Lists all of the System CLUTs defined in the game. System CLUTs are shared between all zones. These CLUTs are currently uneditable. |
View Menu
- Show Room Usages - Toggle whether to show which rooms are using each CLUT. This appears as a number on the left side of each CLUT. Hovering the cursor over this number gives a complete room list.
All CLUTs Preview
A preview of what the currently selected CLUT looks like.
|

|

|
|
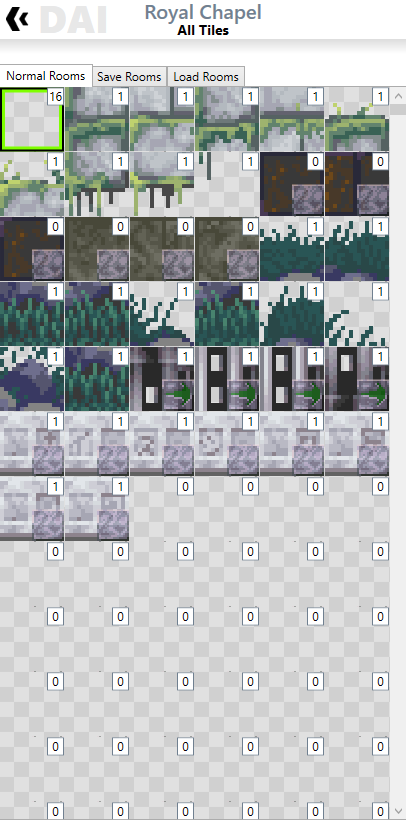
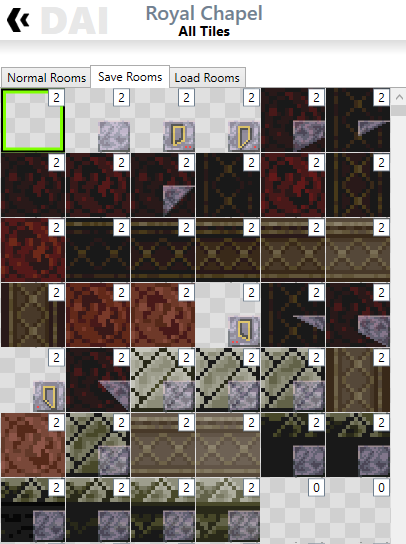
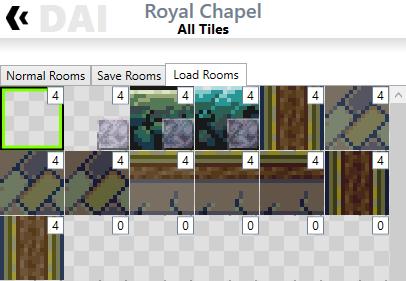
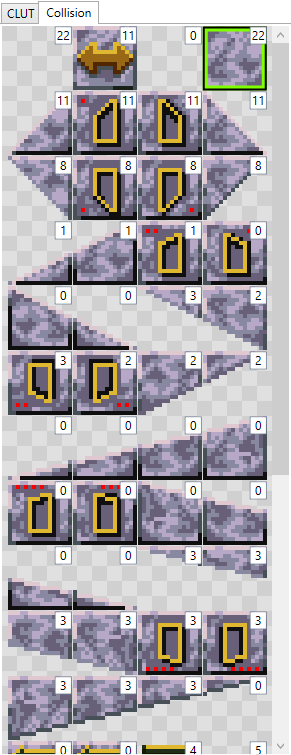
All Tiles Control Panel
These tile listings show a preview of what the tile looks like. In the bottom right corner of each tile is a small overlay with a visualization of the tile's collision setting.
Normal Rooms Listing of all defined tiles in this zone. These are the tiles used for the majority of rooms in this zone. Clicking on one of these will select it to be previewed on the right. Double clicking one of these will hide all other tiles and enter Tile Edit Mode. Save Rooms Listing of all defined tiles that are specific to save rooms. Clicking on one of these will select it to be previewed on the right. These tiles are currently uneditable. Load Rooms Listing of all defined tiles that are specific to load rooms. Clicking on one of these will select it to be previewed on the right. These tiles are currently uneditable. |
View Menu
- Collision Preview (Tile List) - Toggle whether to show which collision type is assigned to each tile. This appears as a small visualization overlaying the bottom right 1/4 of the tile in the list.
- Collision Preview (Tile Render) - Toggle whether to show which collision type is assigned to the currently selected tile in the bottom left corner of the preview panel.
- Show Room Usages - Toggle whether to show which rooms are using each tile. This appears as a number in the top right corner of each tile. Hovering the cursor over this number will give a complete room list.
All Tiles Preview
A preview of what the currently selected tile looks like (bordered in black).
In the bottom left corner is a visualization of the assigned collision for the currently selected tile (bordered in red). |
|
|
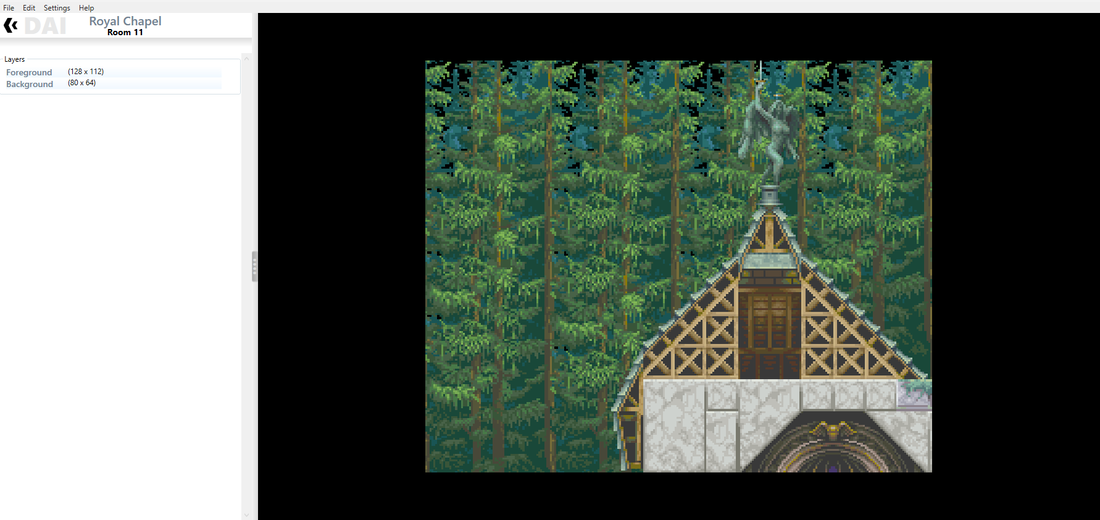
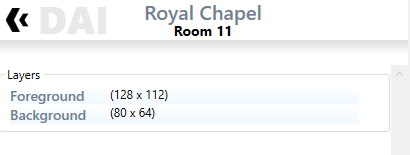
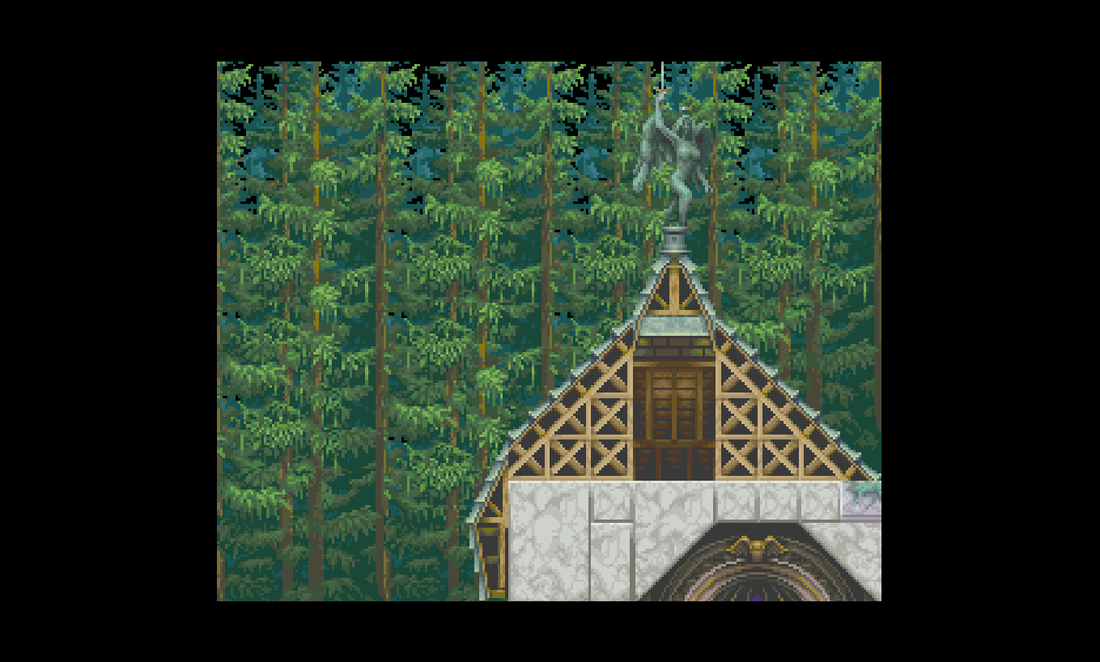
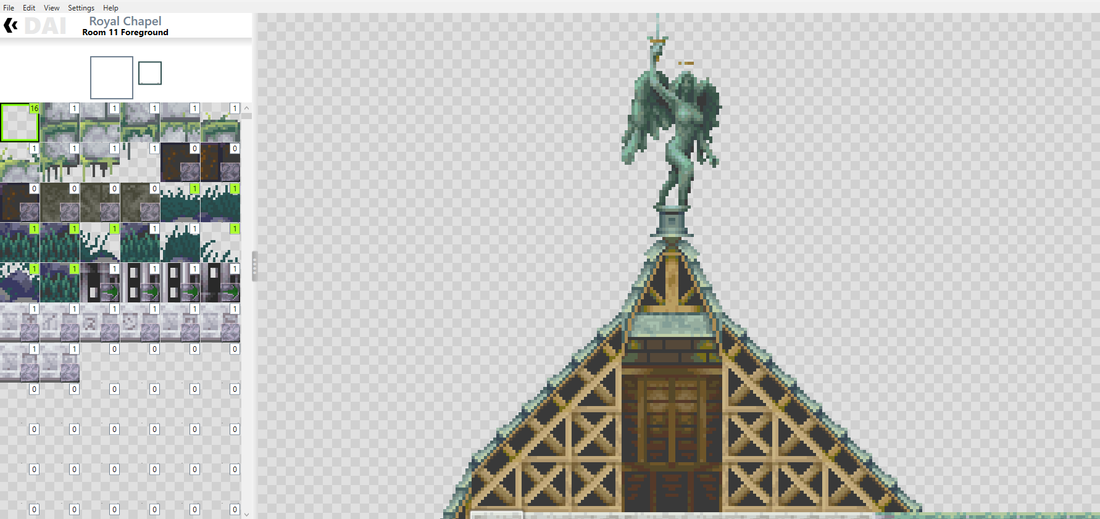
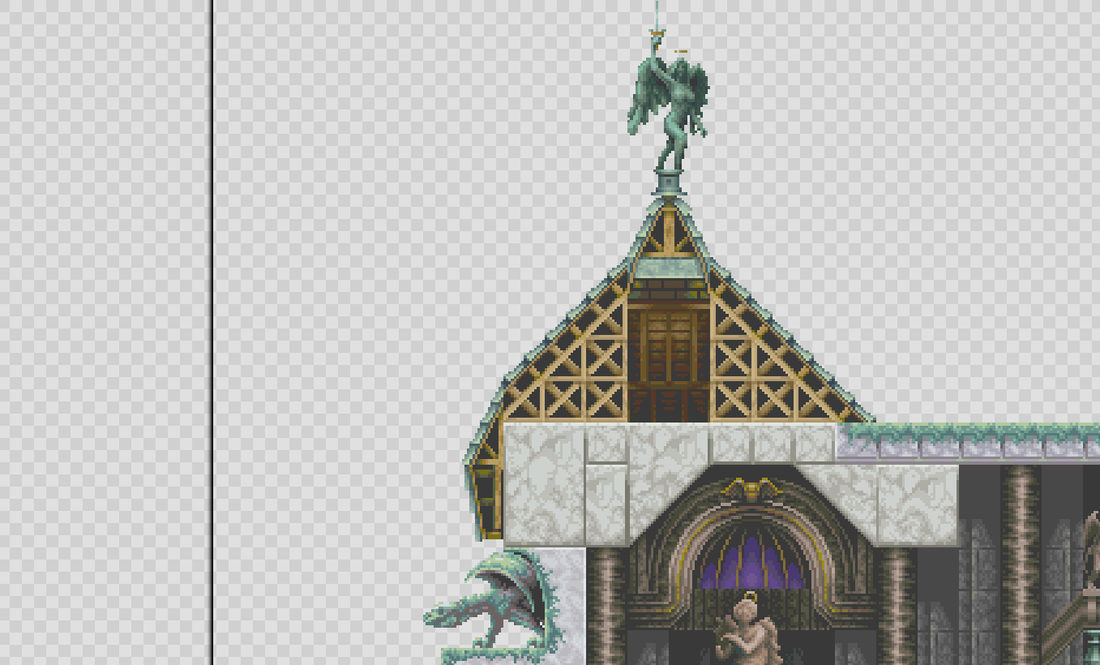
This mode mostly acts as a way to preview what your changes may look like in the actual game. You'll find full parallax support for the foreground/background layers here.
On the left, you'll find a list of the layers in use for this room, and on the right you'll see the preview of the room.
Clicking on one of the layers on the left will hide the other layers and enter Layer Edit Mode.
|
|
Room Edit Control Panel
Layers List
Lists all of the defined layers for this room. Every room that uses a tile layout will have a foreground layer, and some rooms will also define a background layer to add depth. Click on one of these to hide the other layers and enter Layer Edit Mode. |
Room Edit Preview
A preview of what this room would look like in-game, with full parallax between the foreground and background layers. This is intended primarily for quickly checking whether your layers interact as expected before building a whole CD Image.
|
|

|
Layer Edit Control Panel
Each room can be defined as one of the following types:
Selected Tile At the top, you'll see the currently selected tile, and to the right of it, smaller, is a visualization of the currently selected tile's assigned collision type. Tile List List of all defined tiles for this room type. For normal rooms, this is unique to the zone, but for save and load rooms, these tiles are shared across all zones. Clicking on one of these will select it for placement in the preview on the right. Double clicking on one of these will hide all other tiles and enter Tile Edit Mode. |
View Menu
- Collision Preview (Tile List) - Toggle whether to show which collision type is assigned to each tile. This appears as a small visualization overlaying the bottom right 1/4 of the tile in the list.
- Collision Preview (Layer Render) - Toggle whether to visualize the collision types assigned to all of the tiles in this layer in preview panel. Note that even though collision can be assigned to tiles used in the background layer, only collision on tiles in the foreground layer are actually used in-game.
- Show Room Usages - Toggle whether to show which rooms are using each tile. This appears as a number in the top right corner of each tile. Hovering the cursor over this number will give a complete room list.
Layer Edit Preview
A preview of what this layer looks like. Clicking in here will assign the currently selected tile (in the control panel) to the location under your cursor.
|
|
|
|
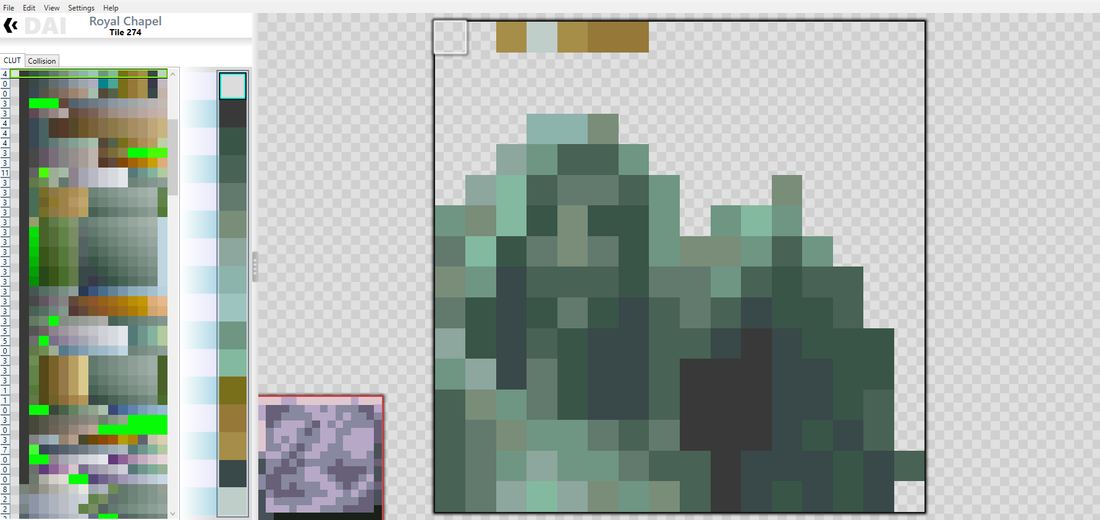
Tile Edit Control Panel
On the left you will find tabs for CLUT and Collision selection.
|

|
View Menu
- Show Room Usages on CLUTs - Toggle whether to show which rooms are using each CLUT. This appears as a number on the left side of each CLUT in the CLUT list. Hovering the cursor over this number gives a complete room list.
- Show Room Usages on Collisions - Toggle whether to show which rooms are using each collision type. This appears as a number in the top right corner of each collision visualization in the collision list. Hovering the cursor over this number gives a complete room list.
- Collision Preview (Tile Render) - Toggle whether to show which collision type is assigned to the currently selected tile in the bottom left corner of the preview panel.
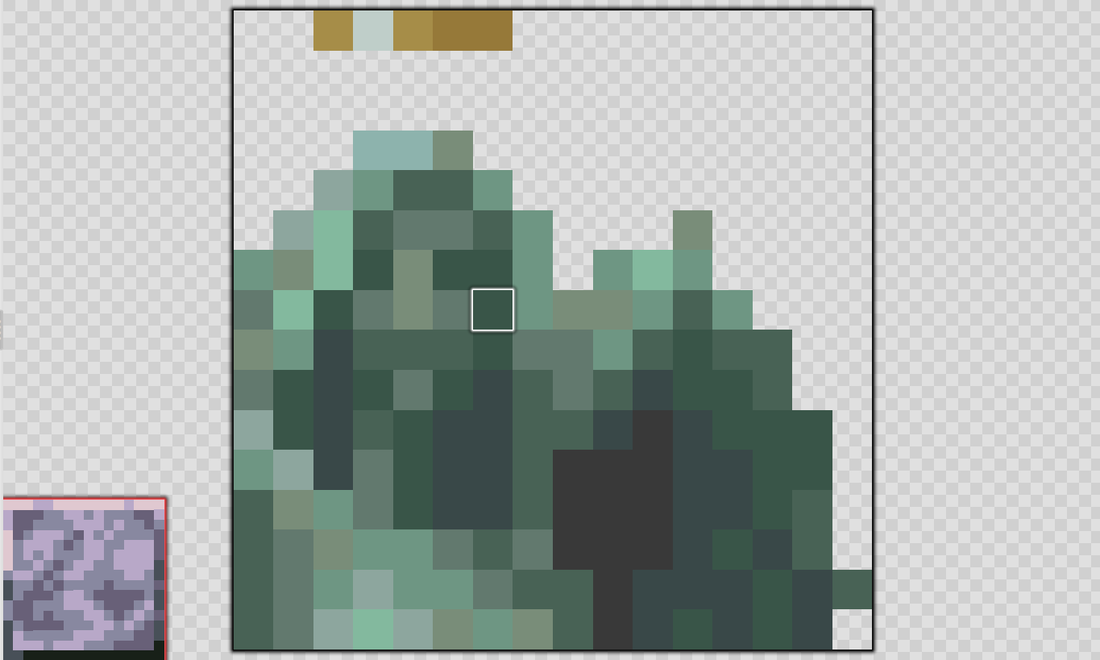
Tile Edit Preview
A preview of the arrangement of CLUT colors that make up this tile. Clicking here will assign the currently selected CLUT color (in the control panel) to the pixel under your cursor.
|
|

|
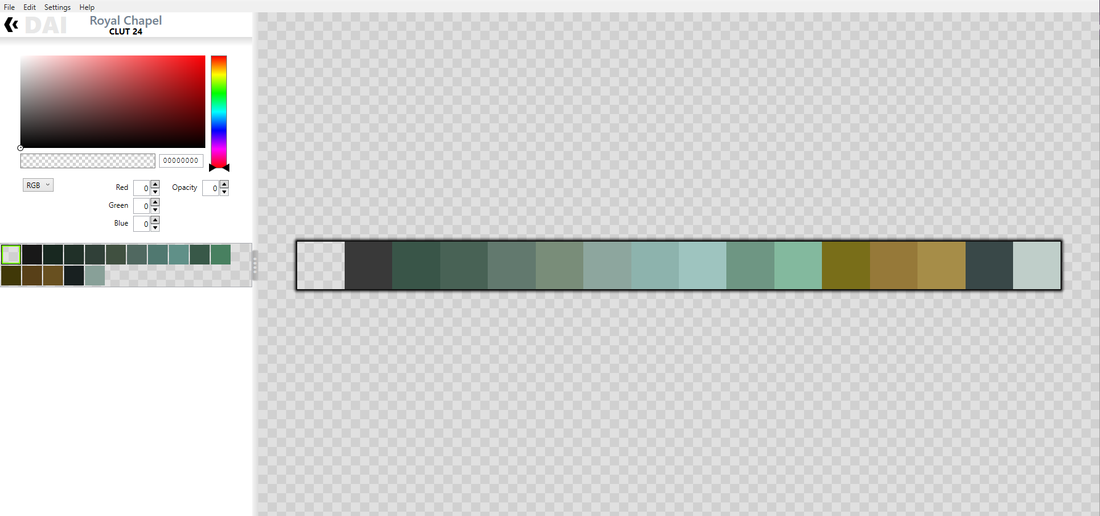
CLUT Edit Control Panel
At the top is a color picker for changing the color assigned to the selected CLUT slot.
Underneath that is the collection of 16 color slots that make up this CLUT. Clicking on one of these will select that color slot for editing in the color picker. |
CLUT Edit Preview
A preview of the CLUT, showing how the colors would appear in-game.
|

|
It's important to note that the colors in the control panel and the colors in the preview are subtly different. The PSX hardware has a color intensity ramp that doesn't match that on the PC. The colors seen on the left are what they would look like on PC (to match color selection in the color picker), whereas the colors in the preview on the right are more what they would look like on the PSX hardware.
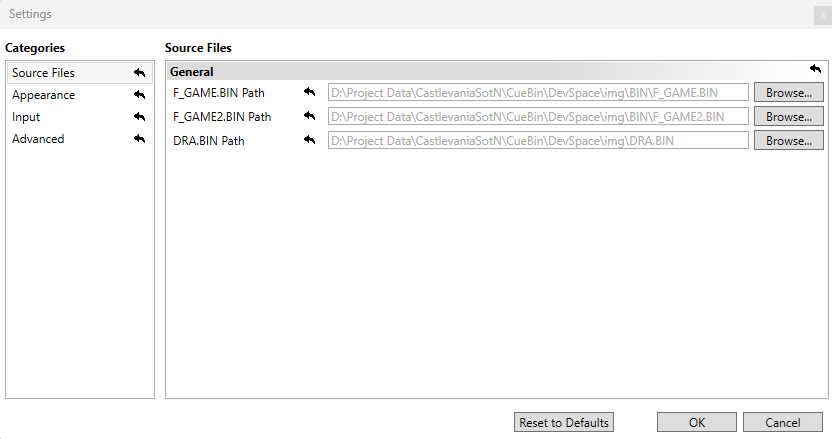
Source Files
|

|
- F_GAME.BIN Path - The path to the F_GAME.BIN file extracted from the CD Image. This file is necessary as it contains system CLUTs and tiles/graphics that are shared for "Castlevania: Symphony of the Night" zones.
- F_GAME2.BIN Path - The path to the F_GAME2.BIN file extracted from the CD Image. This file is necessary as it contains system CLUTs and tiles/graphics that are shared for "Castlevania: Bloodlines" zones.
- DRA.BIN Path - The path to the DRA.BIN file extracted from the CD Image. This file is necessary as it contains system tiles that are shared for all zones' save & load rooms.
Input
|

|
- Cycle Hovered Object - In some scenarios, it's possible that preview elements can overlap (for example, zones typically overlap around the load room/transition areas). In the case where your mouse is hovering over one of these overlapping areas, pressing the configured key will cycle thru all overlapped objects, allowing each to be highlighted in sequence.
Advanced
|

|
- Advanced Properties - This will enable manual editing of currently-unsupported properties in some editing modes. Making changes in these sections may or may not cause rendering problems and/or crashes in both ZoneEd and the game itself. Since advanced properties are unsupported, there is no documentation for the GUI nor the properties themselves. Make changes here at your own risk.

Advanced properties will appear in editing modes that support them, as a light yellow colored expander in the control panel.